This article will explain how ServiceBox moves Vendor Orders into QuickBooks Desktop and creates Purchase Orders and Item Receipts for the same.
We recommend you take a look at this article about Vendor Order accounting settings first, since you have to have the settings configured before you can do the actual sync:
The other helpful article to look at is this one about Vendor Order Settings, which logically should also be finished before you get to the step of actually completing a sync (since you have to be able to make a Vendor Order, before you can send it anywhere): https://support.jobboxsoft.com/en/support/solutions/articles/19000141826-vendor-order-settings
All caught up? Let's move forward with how to do a QBD Vendor Order accounting sync.
How ServiceBox creates purchase orders in QuickBooks Desktop:
This is affected by the Vendor order status and settings setup in the accounting tab.
For example, if you have the Vendor Order status set to "Ordered Items/requested" (The terminology for status may vary from company to company) and run the sync, the system will create a Purchase Order for that Supplier in QuickBooks Desktop. (see below)
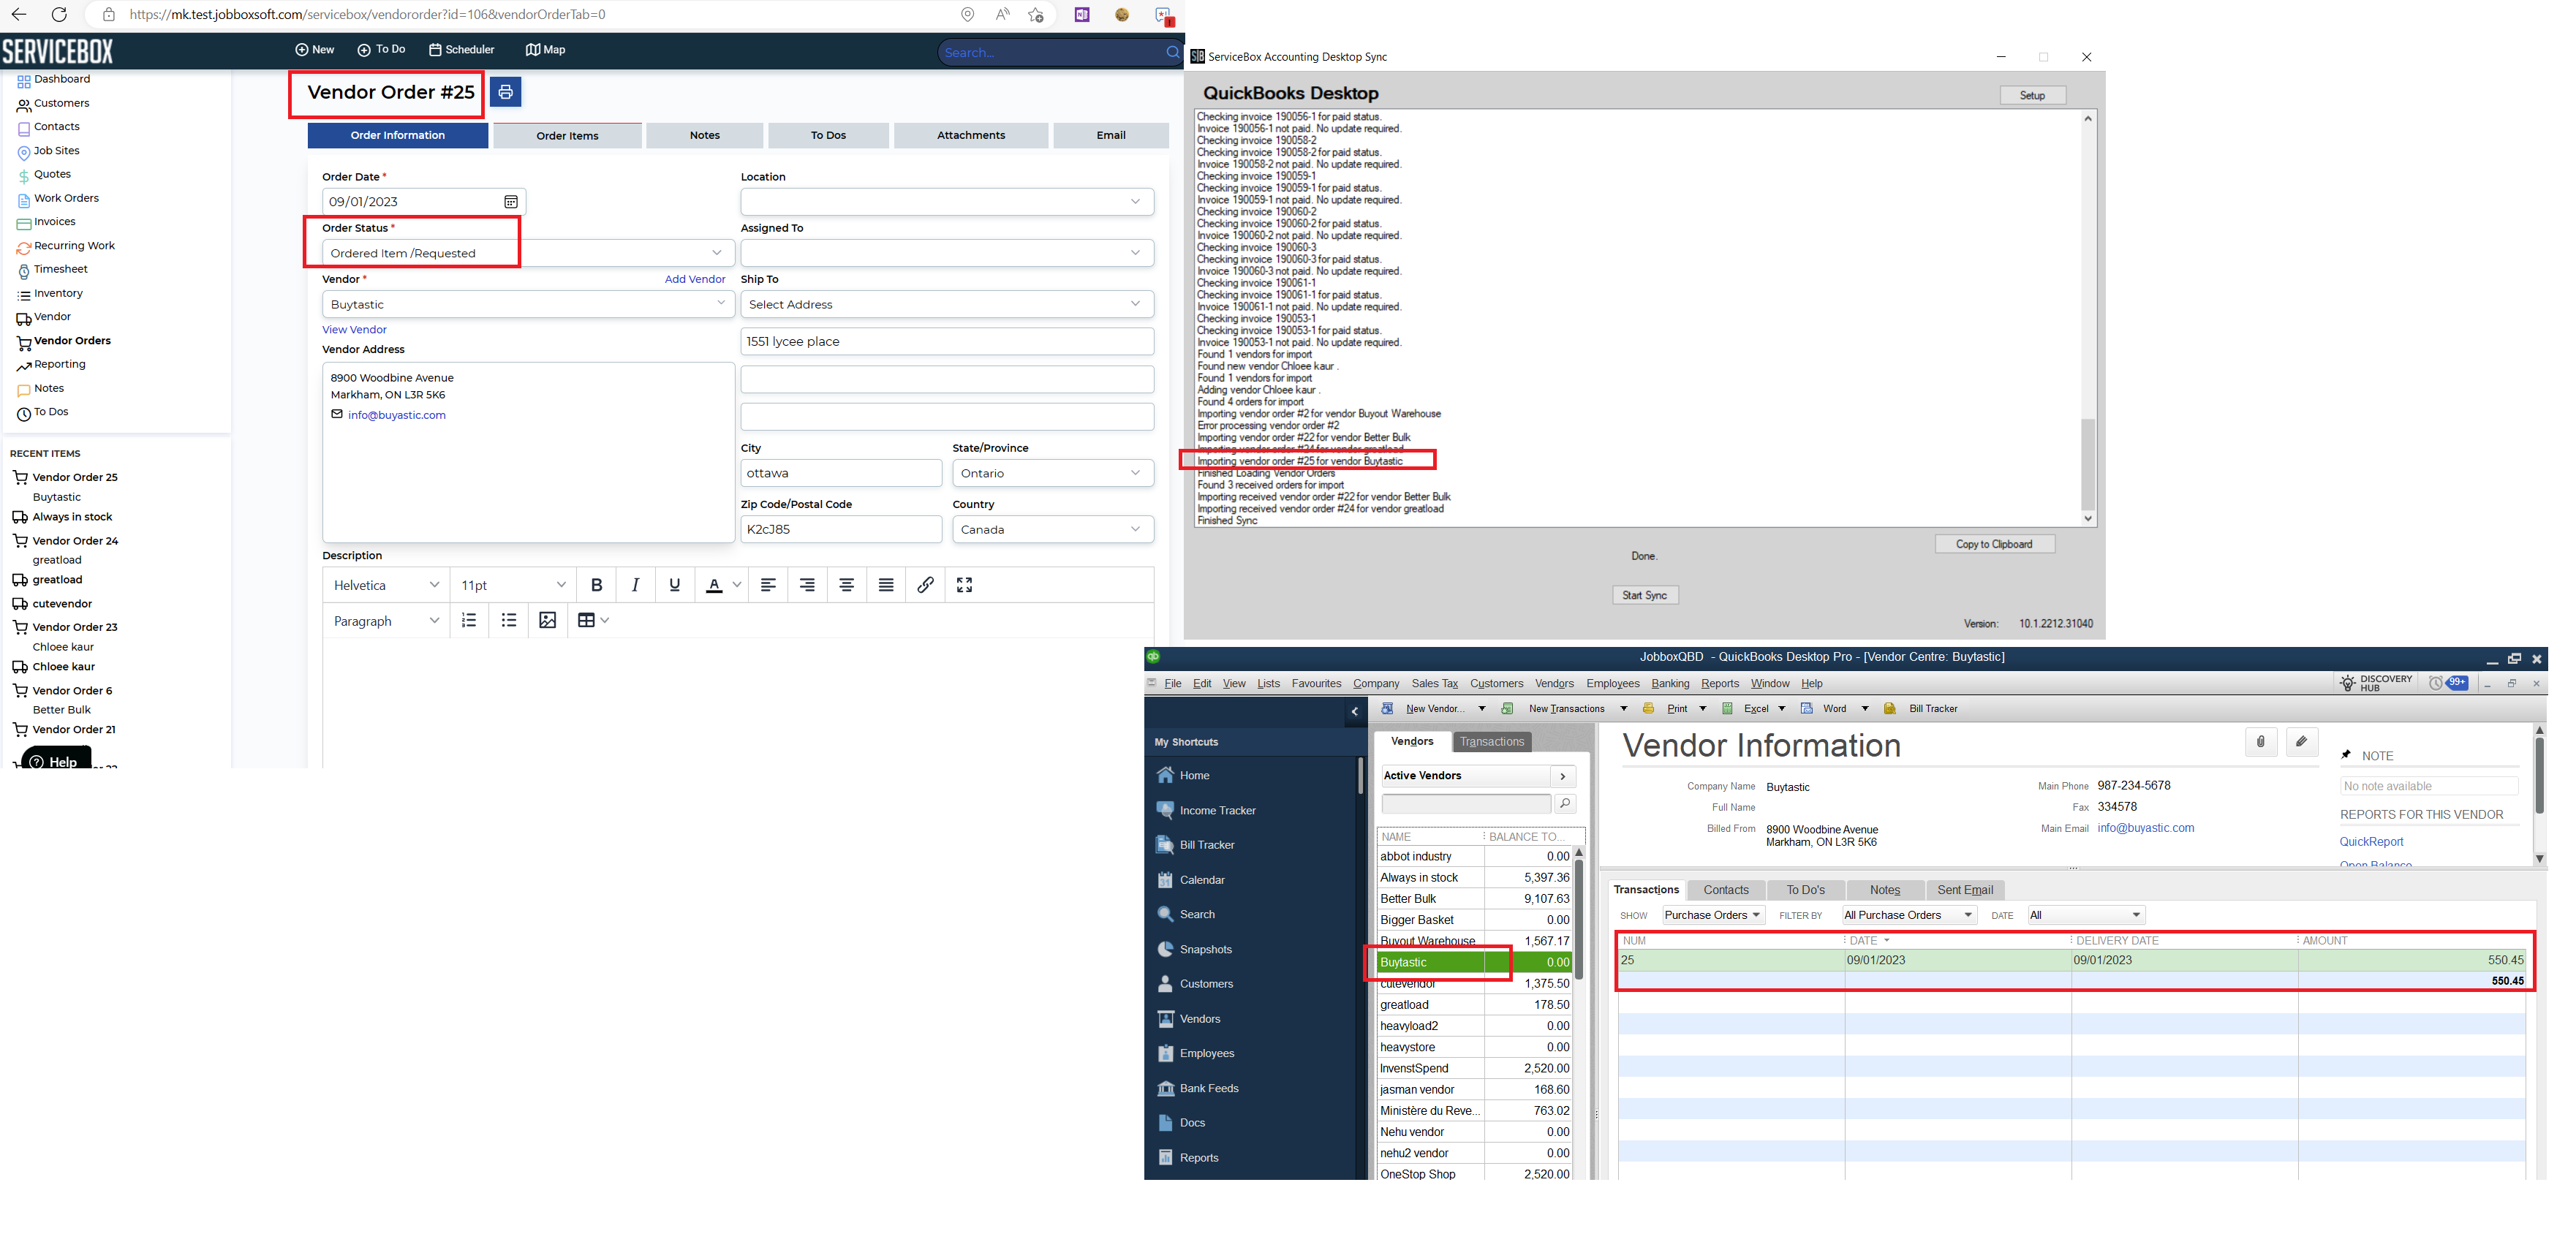 How ServiceBox creates an Item Receipt in QuickBooks Desktop:
This is also defined by the Vendor order status and settings setup in the accounting tab.
If you have the Vendor Order status set as "Received" and run the sync, the system will move the purchase order into Quickbooks Desktop and create a Bill there.

Note: If you open the Vendor order in ServiceBox and click the "Show Links" button appearing in the top right corner,
you'll notice the system creates two separate link types; one for Ordered Items and second for the "Received" (Bill/Receipt).
