Summary
This document will prepare your business in getting your QuickBooks Company file ready to connect with ServiceBox. It will go through some data scenarios and explain things to consider when syncing QuickBooks Desktop with ServiceBox.
Synced Data
ServiceBox will allow your company to do the following with your QuickBooks Company File:
Export Customers (and Job Sites) from QuickBooks - this is usually done during the initial setup. An exported customer will export the following:
Customer Info - Name
Address information
Phone info
Website info
Email info
etc.
Import New Customers and Job Sites created in ServiceBox into QuickBooks. If a New Customer in ServiceBox matches a Customer in QuickBooks, ServiceBox will attempt to link the two customers.
Update Existing Customers. Once a customer in ServiceBox is linked to a Customer in QuickBooks all updates to the Customer will be synced to QuickBooks from ServiceBox.
Import new invoices from ServiceBox and put them into QuickBooks. This will create a new invoice in QuickBooks related to the Customer and Job Site from ServiceBox. All items and prices are imported as well.
If an invoice that was imported from ServiceBox is marked to Paid in QuickBooks it will mark the invoice Paid in ServiceBox.
If you are using Payments in ServiceBox it will import all payments into QuickBooks.
Integration
Once ready to setup the integration with QuickBooks Desktop we will install an Accounting Connector to the computer that QuickBooks is installed on. We will configure all of the settings and ensure that ServiceBox and QuickBooks can talk to each other.
There are some settings that we can set in the Accounting Connector:

Add/Update Customers from accounting To ServiceBox - This selection allows you to import customers from QuickBooks to ServiceBox. Recommended to only turn this “on” to import at beginning but to turn off once ServiceBox is set up.
Selected customers only - Check this off if you only want to import select customers.
Only import ServiceBox customers with invoices to accounting - This setting will only import customers into QuickBooks that have an invoice associated with them. Use this if you want to keep some customers in ServiceBox only.
Append company name to individual name for import from ServiceBox - What this setting will do is if there is a first and last name (ie an individual) and there is a company name, then this will append the company name to the end of the individual name when put into QuickBooks. So if the name is Bob Smith and company is Bob’s Builders, then when put into QuickBooks it will be Bob Smith - Bob’s Builders.
Use ServiceBox invoice numbers in accounting - If you want to use the ServiceBox invoice numbers in QuickBooks then check this off.
Put the ServiceBox Invoice numbers in Invoice Memo - If you want to use the QuickBooks numbers in accounting, but need a reference to the ServiceBox invoice number. Then check this off to add the ServiceBox invoice into the memo field for the invoice in QuickBooks.
Put Customer name on first address line in accounting - If your company has the customer name at the top of the address in the Bill To field in QuickBooks, then you need to check this off.
Use last name, first name for individual display name - If you set up QuickBooks to be Last name, First name then you need to check this off.
You don’t need this info for the setup, but if you need more information on the Accounting Connector Setup please go here:
Getting Started
In order to get the data ready for importing Customers (and Job Sites if they exist) into ServiceBox, you will need to go into QuickBooks Desktop and ensure the data is clean and ready to be synced. The instructions below go through the various data situations and what to watch out for, and possibly what you should change. We recommend going through and updating the data before we connect ServiceBox to QuickBooks desktop so it will speed up the time required. Some things to consider:
Back up your Company file, just in case.
Block out a bit of time to process the data.
Follow the instructions as best as possible to speed up the installation of ServiceBox.
If you display your customers using Lastname, Firstname, there are some settings described above that you will need to set. Specifically: “Use last name, first name for individual display name”
If you enter in the Customer name into the first line of the Bill To field in QuickBooks, then be sure to check off in Settings: “Put Customer name on first address line in accounting”.
Recommended Settings for Companies
When adding in a Company from QuickBooks to ServiceBox these changes are important to be made in QuickBooks:
Customer Name is the only field that is required. If the Company Name is entered then it should match the Customer Name.
If you enter in the Customer name into the first line of the Bill To field in QuickBooks, then be sure to check off in Settings: “Put Customer name on first address line in accounting”. The address line one must match the Customer Name.
Alternate Settings for Companies
If you want to preserve the Display Name that is found in QuickBooks:
Ensure the Company Name and address Line 1 Match
If you want to have a display name different than the company name. (in the case of a company name that has a numbered company)
Recommended Settings for Individuals
When adding a Customer that is an Individual from QuickBooks to ServiceBox these changes are important to be made in QuickBooks:
First and Last Name need to be entered and they should match the Customer Name. You can enter a spouse name into the first name as well if required, but all fields must match.
If you display your customers using Lastname, Firstname, there are some settings described above that you will need to set. Specifically: “Use last name, first name for individual display name”. The name that will be used in the Bill To is FirstName Lastname not Lastname, Firstname.
If you enter in the Customer name into the first line of the Bill To field in QuickBooks, then be sure to check off in Settings: “Put Customer name on first address line in accounting”.
Handling Company or Individual Names in Address Line 1
Jon - what do you do for this??If you want to preserve the Display Name that is found in QuickBooks:
Possible Data Scenarios in QuickBooks
Customer Name does not match Invoice/Bill To
If your company enters the Customer’s Name into the Bill To field, then it is essential for the Customer Name field to match the first line in the Bill To field.
For example, the Customer “Quiznos Subs Albert St” is not the same as the “Quiznos Subs” in the Bill to field:
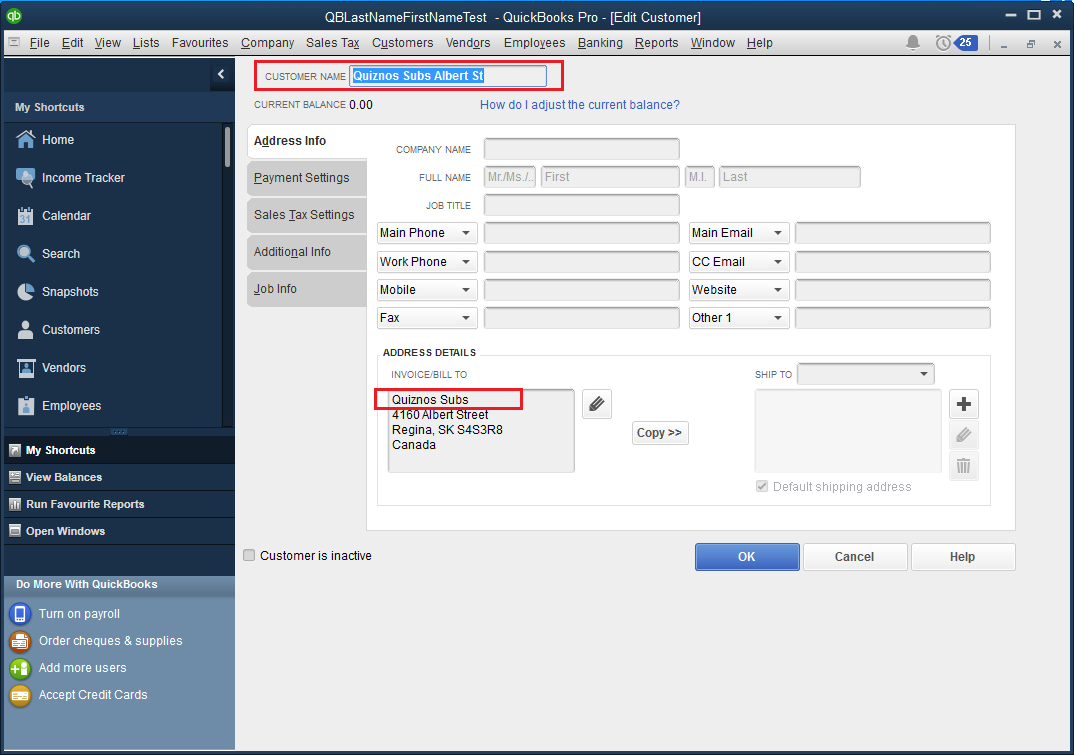
If you try to import you will notice that the address line one field of the Bill To will appear in the address line 1 column. In this case it shows up as Quiznos Subs.

Recommended changes:
Make Customer Name and The first line of Bill To to be the same
Enter in the same name into the Company Name field.
This is what it will look like once the changes are made:

When we go to Import the Address now appears correctly:

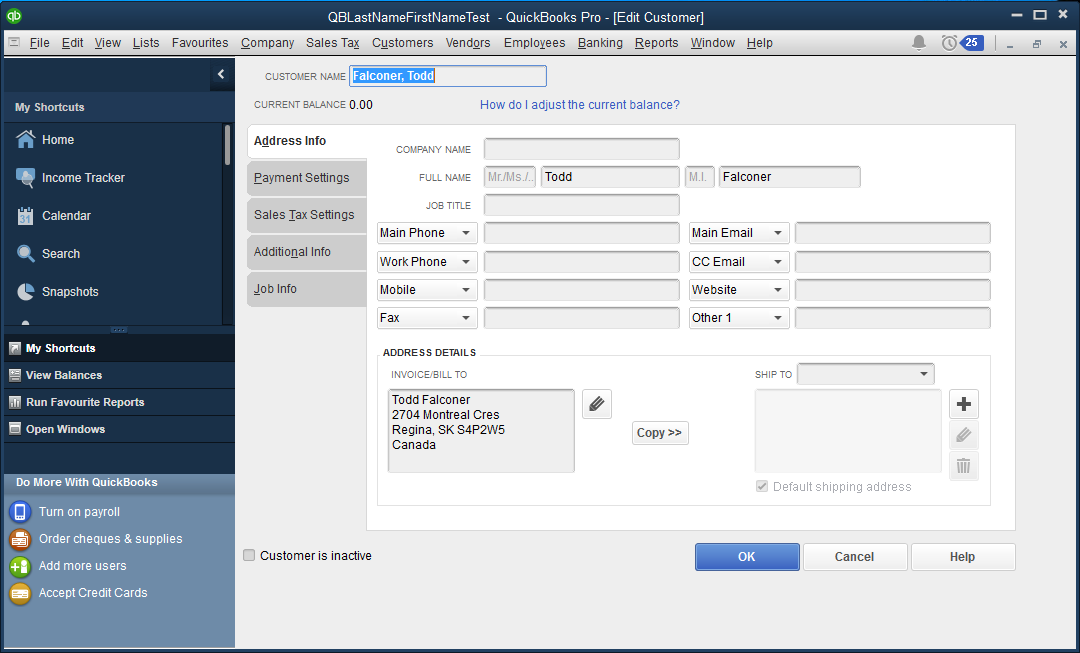
Customer Name (Individual), has not entered First and Last Name.
If you have a Customer that is an Individual, it is important to enter in the first and last name for the customer in the appropriate places, so that it will be treated as an Individual.
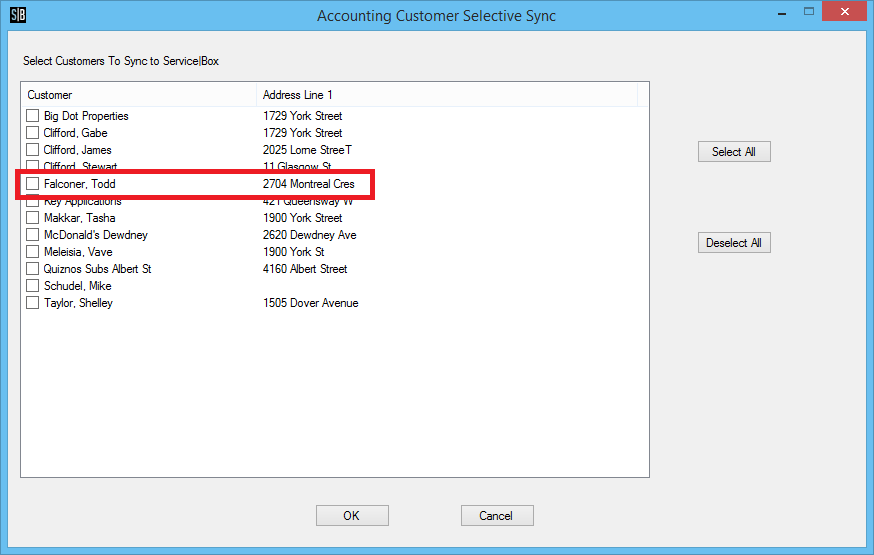
For example this customer: “Falconer, Todd” does not have the First and Last name entered. When Imported it will be treated as a Company unless the first and last names are entered correspondingly.

When we go to import the customer from the Accounting Connector the name of the customer appears in the Address Line 1:

Recommended Changes
Enter in the First and Last name for the customer.
Ensure the First and Last Name in the Bill To area match the Customer Name.
After the changes the Customer looks like this:
In the Accounting Connector in the Import you will see the Address Line One appears correctly:
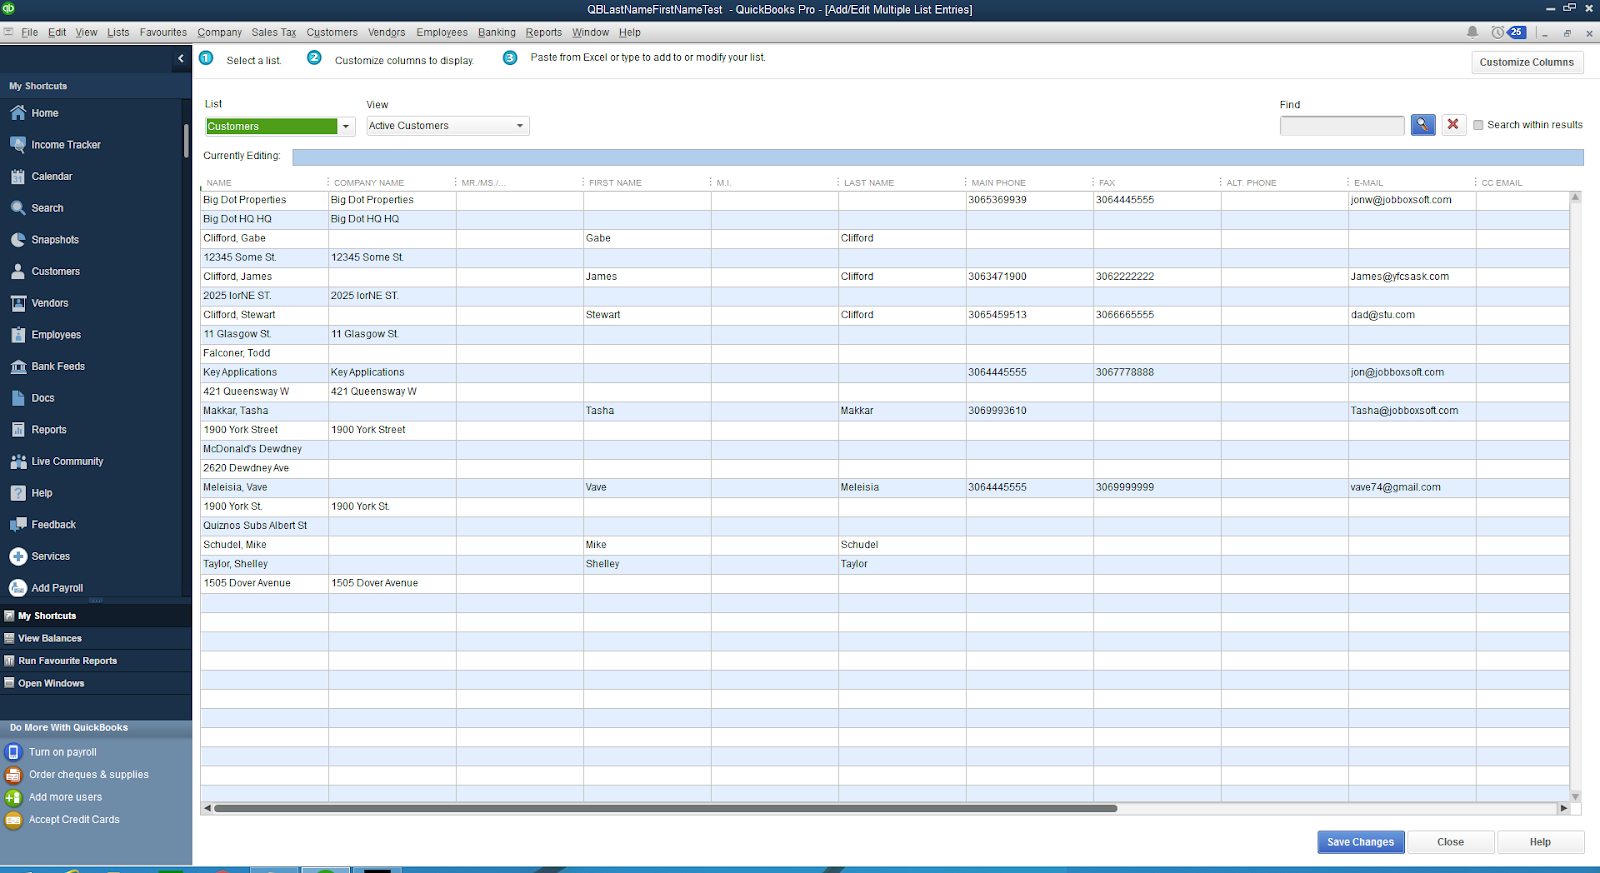
QuickBooks Mass Editing of Customers
If you are in a place where you want to quickly edit the Customers in QuickBooks you can do the following:
Go to Lists -> Add/Edit Multiple List Entries
You will get a view that will allow you to edit the Customers quickly.

Job Site Info
Jon - What do we need to put in here??Recommended Settings for Importing Job Sites
Processing the Import of Customers and Jobsites from QuickBooks to ServiceBox
Once you have all of the data in QuickBooks cleaned up and ready to go, we will be ready to start importing those customers and job sites into ServiceBox. It is important to set up the accounting connector so that it is configured related to how your QuickBooks file is connected.
In order to do this you will need to:
Go through QuickBooks and make sure the data has been modified correctly.
Ensure the Accounting connector has been configured properly as per instructions here: https://jobbox.freshdesk.com/a/solutions/articles/19000067241-accounting-connector-0004-accounting-integration-setup -
Enter Settings in the Accounting Connector as per your QuickBooks file.
Click on Add/Update customers from accounting to ServiceBox. Choose “Selected customers only” this will allow you to review the import and see which Customers from QuickBooks will be imported into ServiceBox. We will also be able to view some of the data that is going to be imported.